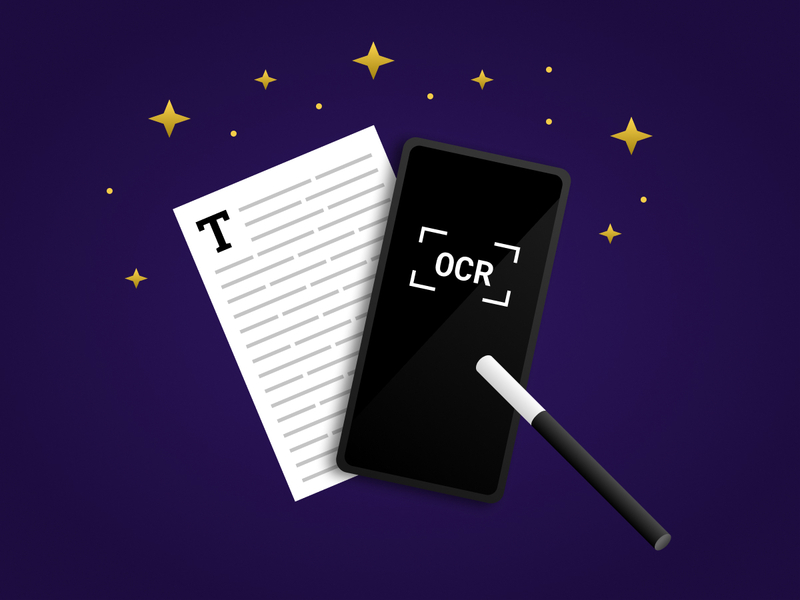
So, you want to be a magician, but you just don't have the finesse required to master that tricky slight of hand and growing a marvelous moustache just isn't on the cards for you. Tragic indeed, but don't despair. Today we'll be throwing out the props and learning some truly magical skills.
We're going to be building a simple OCR app using CameraX and MLKit's Vision APIs to dazzle your audience and leave your friends spellbound.
People tend to forget that practicing magic is more than just uttering a few obscure phrases while making some delicate hand gestures. I mean, that's a good 90% of it, but the remaining 10% consists of exactly 8% wisdom and 2% skill.
Wisdom: What is OCR?
Obstacle Course Racing is a sport in which a competitor, traveling on foot, must overcome... Wait a second... wrong Wikipedia article. This is awkward.
Let me try that again.
Optical Character Recognition is a technology which analyses images in order to recognize text. This is particularly useful for automating data input tasks, such as capturing credit card details or digitizing printed documents. In short, it's magic!
Skill: What can I do with OCR?
Ohh I don't know, not much... just:
Capture virtually any piece of data without having to type a single letter. Woah!
Translate text on device, on the fly. Wow!
Provide text-to-speech functionality for visually impaired users. Wonderful!
Impress girls (or boys). What?
As you can tell, OCR has a plethora of potential uses, all of which are sure to melt any muggle's mind.
Can a lazy person do it though?
Yup.
What do I need?
You might be thinking "Okay, this sounds great and all, but I simply do not have time to build an entire cross-vendor camera application and train a complex machine learning model like some sort of manic Pavlov. I have a life, you know!".
Alrighty then. Whoosah. Let's calm down and breath a collective sigh of relief because fortunately, the good mages over at Google have blessed us with two marvelous libraries to ease our burdens and light our way.
1 - MLKit
Machine Learning is the process of teaching computers really useful skills, knowing that they may one day take all our jobs and then rise up to destroy our civilization. Let's keep in mind though that Rome was sacked by illiterate Visigoths, so teaching the machines how to read probably won't make any sort of difference anyway. Probably. Maybe. Meh.
MLKit is Google's on-device machine learning toolkit which provides a set of APIs for bringing the power of machine learning to mobile.
Now, while this tutorial will be primarily geared towards Team Green, any white wizards should know that MLKit is also available on iOS.
Below is a breakdown of all the APIs currently provided by MLKit:
You know how painful it is to build a fully-functional camera app that not works on nearly every Android device out there, but also provides backwards-compatibility? Yes? Well, that's probably because you're not using CameraX.
Can we get on with the tutorial already?
Sheesh, okay! And I prefer the term ritual, thank you very much.
Step 1 - Tabula rasa
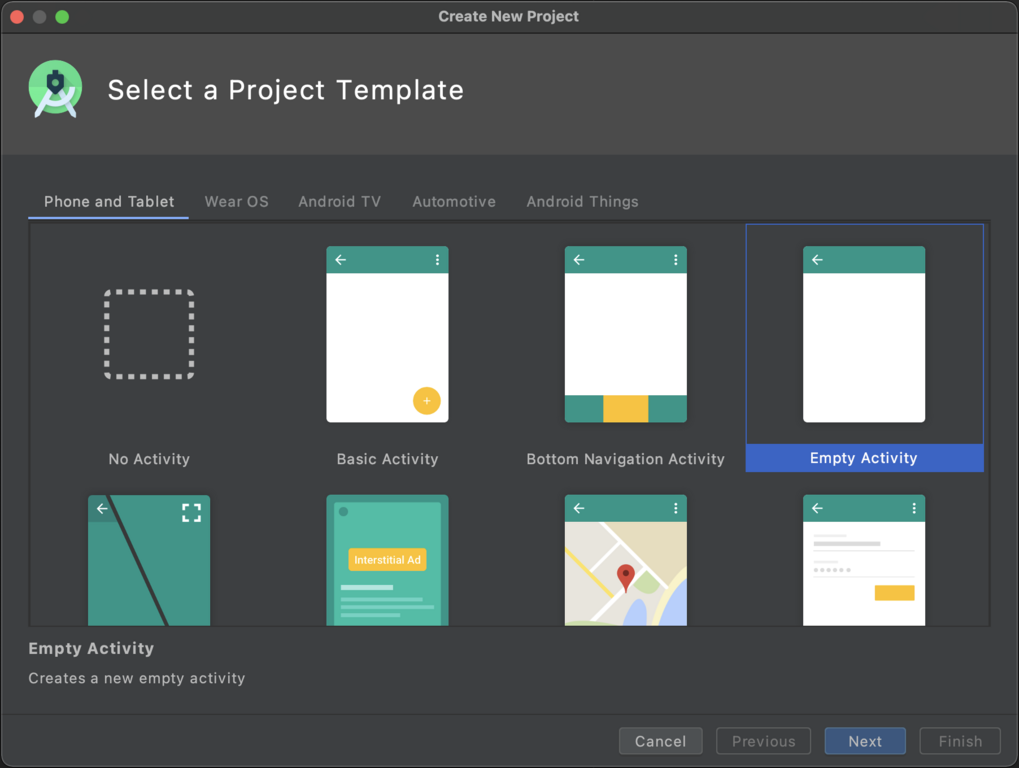
Let's start by creating a new project. When prompted to select a Project Template, you can go ahead and select Empty Activity.
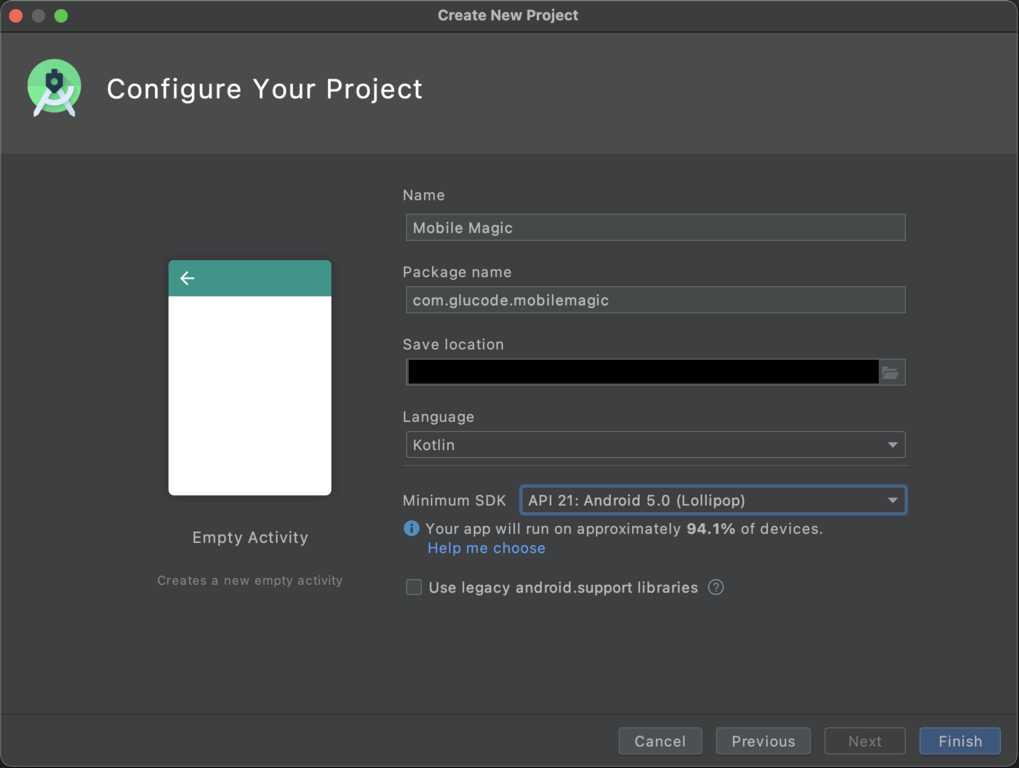
Next, enter the project name and be sure to select the desired SDK version. Note that API 21: Android 5.0 (Lollipop) is the minimum SDK version supported by CameraX, so I'll be selecting that.
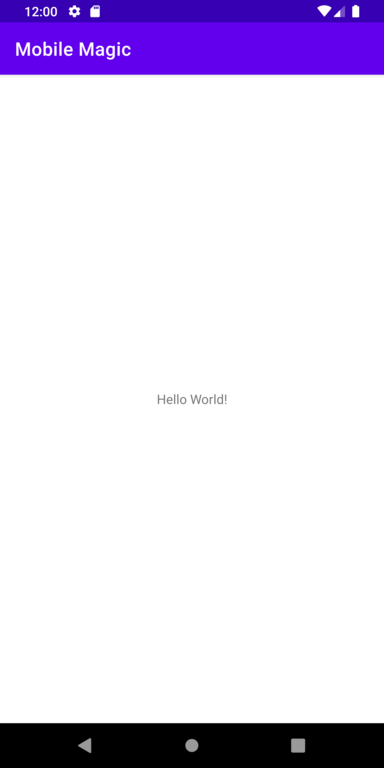
After hitting Finish and waiting a few seconds for the Gradle sync to complete, you should be looking at a fresh new project, ready to be Run.
Well, it may not look particularly magical right now, but we'll soon perform a few incantations and sacred spells to get the good stuff going.
Step 2 - Add a sprinkle of CameraX and a dash of MLKit
You want to head on over to your build.gradle app file and plomp the following snippit into the dependencies section. As you can probably tell, the first three lines are for the CameraX dependencies while the final line is for MLKit; specifically the Text Recognition API.
Finally, you want to make sure that the following plugin is applied at the top of the file
plugins {
    id 'kotlin-android-extensions'
    //whatever else was here before
}
With that done, go ahead and hit Sync Now or Sync Project with Gradle Files button.
Step 3 - Unwrap the crystal ball
Trust me, doing magic while blindfolded can be dangerous business. If we're going to pull off such a powerful spell, we'll need to be able to peer through the eyes of our electronic minion.
To do this, open up activity_main.xml and burn it with holy fire. If you're a rookie mage or you're not familiar with casting holy fire yet, that would be Ctrl/Cmd+A Delete.
You may now proceed to copy-paste the following into the cleansed file.
PreviewView is a CameraX class that can be used to display a preview from the camera feed. Like a viewfinder.
Step 4 - Speak the magic incantation
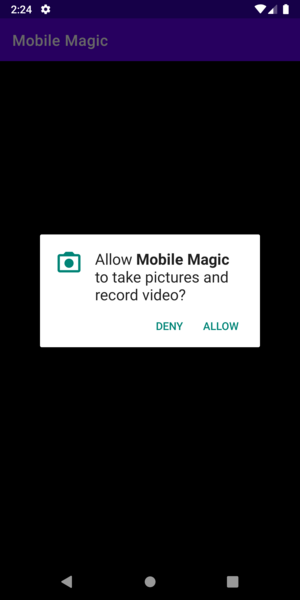
No amount of black magic will allow you to use the user's camera hardware without first being granted permission. This is of course similar to vampires having to be invited inside. Remember, the magic words are "Pretty please".
In order to request camera permission, start by adding the following to the AndroidManifest.xmlfile; right after the opening manifest tag and the before the application tag.
This specifies that our app will require camera permission and that any old camera will do. Alternatively, we could explicitly require that the device must have a backwards-facing camera if we cared about that.
Next up, we need to add the following code to MainActivity.kt file.
private val isAllPermissionsGranted get() = REQUIRED_PERMISSIONS.all {
ContextCompat.checkSelfPermission(this, it) == PackageManager.PERMISSION_GRANTED
}companion object {
private val TAG = MainActivity::class.java.name
private val REQUIRED_PERMISSIONS = arrayOf(Manifest.permission.CAMERA)
private const val REQUEST_CODE_PERMISSIONS = 10
}
REQUIRED_PERMISSIONS is an array of permissions required to complete the task at hand; in this case we will just be requiring the CAMERA permission.
REQUEST_CODE_PERMISSIONS is a value which we will use to request permissions, and then later check the user's response
isAllPermissionsGranted is a computed property which is true if we have all the permissions we require, and false otherwise.
Then, we need to implement the permission request logic, so add the following as well.
private fun requestPermissions() = ActivityCompat.requestPermissions(this, REQUIRED_PERMISSIONS, REQUEST_CODE_PERMISSIONS)
override fun onRequestPermissionsResult(requestCode: Int, permissions: Array<String>, grantResults: IntArray) {
if (requestCode == REQUEST_CODE_PERMISSIONS) {
if (isAllPermissionsGranted) {
startCamera()
} else {
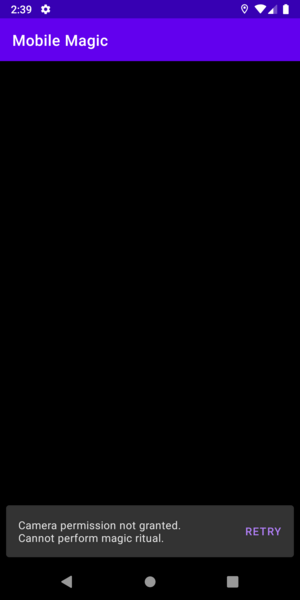
Snackbar.make(preview_view, "Camera permission not granted. \nCannot perform magic ritual.", Snackbar.LENGTH_LONG).setAction("Retry") {
requestPermissions()
}.show()
}
}
}
private fun startCamera() {
//TODO - start the device's camera
Log.d(TAG, "Camera started")
}
requestPermissions() is a function which will do the actual permission request
onRequestPermissionsResult() is where we handle the user's response.
If permissions have been granted, we can start the camera.
If not, we show a Snackbar with a "Retry" option
startCamera() will eventually start the device's camera. For now it will just log to the console.
Finally, we need to request the permissions if not already granted.
Update the onCreate method like so:
override fun onCreate(savedInstanceState: Bundle?) {
    super.onCreate(savedInstanceState)
    setContentView(R.layout.activity_main)

    if (isAllPermissionsGranted) startCamera() else requestPermissions()
}
Step 5 - Call forth a text recogniser
We're going to skip ahead a little and circle back 'round to the camera logic in a moment. For now, we want to define a new class to encapsulate the MLKit logic so that we can consume it in the camera setup.
Create a new Kotlin file named MagicTextRecognizer and copy the below code in there.
class MagicTextRecognizer(private val onTextFound: (String) -> Unit) {
    fun recognizeImageText(image: Image, rotationDegrees: Int, onResult: (Boolean) -> Unit) {
        val inputImage = InputImage.fromMediaImage(image, rotationDegrees)
        TextRecognition.getClient()
            .process(inputImage)
            .addOnSuccessListener { recognizedText ->
                processTextFromImage(recognizedText)
                onResult(true)
            }
            .addOnFailureListener { error ->
                Log.d(TAG, "Failed to recognize image text")
                error.printStackTrace()
                onResult(false)
            }
    }

    private fun processTextFromImage(text: Text) {
        text.textBlocks.joinToString {
            it.text.lines().joinToString(" ")
        }.let {
            if (!it.isBlank()) {
                onTextFound(it)
            }
        }
    }

    companion object {
        private val TAG = MagicTextRecognizer::class.java.name
    }
}
onTextFound() is a callback that will be triggered when we detect some text
TextRecognition.getClient() is how we instantiate the MLKit TextRecognition API.
We call .process() and pass in the Image that we would like to process
We add onSuccess and onFailure listeners
processTextFromImage() is where we break down the Text object and construct a string with which to invoke onTextFound(). For now, we're just joining it all into a single unprocessed string.
Step 6 - Conjure up an image analyzer
An Image Analyzer is a component that does some form on analysis on an image. No surprises there. In our case, the analysis will be checking it for text using the MagicTextRecognizerthat we defined in the previous step.
Again, create a new Kotlin file, this time named MagicImageAnalyzer, and copy the following code in there.
class MagicImageAnalyzer(onTextFound: (String) -> Unit) : ImageAnalysis.Analyzer {
    private val textRecognizer = MagicTextRecognizer(onTextFound)

    @ExperimentalGetImage
    override fun analyze(imageProxy: ImageProxy) {
        val image = imageProxy.image ?: return
        textRecognizer.recognizeImageText(image, imageProxy.imageInfo.rotationDegrees) {
            imageProxy.close()
        }
    }
}
MagicTextAnalyzer inherits from ImageAnalysis.Analyzer indicating that it is a customImage Analyzer.
onTextFound is a callback that will be triggered when we detect some text. Just like before.
textRecognizer is an instance of MagicTextRecognizer as defined in step 5.
analyze() will get called for each frame of the video feed from the camera and will pass the image to the textRecognizer.
Step 7 - Summon the camera adapter
The purpose of this class will be to encapsulate all the CameraX logic to avoid leaking our dependencies into the rest of the app and to provide a simple interface for interacting with the camera without the consumer having to worry too much about the implementation details.
class CameraAdapter(onTextFound: (String) -> Unit) {
    private val imageAnalyzerExecutor: ExecutorService by lazy { Executors.newSingleThreadExecutor() }
    private val imageAnalyzer by lazy {
        ImageAnalysis.Builder()
            .setTargetAspectRatio(AspectRatio.RATIO_16_9)
            .build()
            .also {
                it.setAnalyzer(
                    imageAnalyzerExecutor,
                    MagicImageAnalyzer(onTextFound)
                )
            }
    }

    fun startCamera(context: Context, lifecycleOwner: LifecycleOwner, surfaceProvider: Preview.SurfaceProvider) {
        val cameraProviderFuture = ProcessCameraProvider.getInstance(context)
        val runnable = Runnable {
            val preview = Preview.Builder()
                .build()
                .also { it.setSurfaceProvider(surfaceProvider) }
            with(cameraProviderFuture.get()) {
                unbindAll()
                bindToLifecycle(lifecycleOwner, CameraSelector.DEFAULT_BACK_CAMERA, preview, imageAnalyzer)
            }
        }
        cameraProviderFuture.addListener(runnable, ContextCompat.getMainExecutor(context))
    }

    fun shutdown() {
        imageAnalyzerExecutor.shutdown()
    }
}
imageAnalyzerExecutor is an ExecutorService responsible for running the image analysis asynchronously in a new thread.
imageAnalyzer is an ImageAnalysis use case.
We set its analyzer property to an instance of our MagicImageAnalyzer.
We set the TargetAspectRatio to 16:9 to indicate that the entire captured image should be analyzed.
startCamera() is where the magic happens.
We get a ProcessCameraProvider future and define a Runnable which will be responsible for showing the camera preview on-screen.
We also bind the cameraProviderFuture to the LifecycleOwner to ensure that it is lifecycle-aware.
shutdown() kills the imageAnalyzerExecutor and needs to be called when we no longer need to process the camera output.
Step 8 - Invoke the spirit of the machine
You can now update MainActivity.kt to reference our shiny new CameraAdapter. For now we will just be logging the recognized text to the console, but from here on out, the sky is the limit.
Don't forget to call cameraAdapter.shutdown() when the activity is destroyed to ensure that the thread is killed.
private val cameraAdapter = CameraAdapter {
    Log.d(TAG, "Text Found: $it")
}

private fun startCamera() = cameraAdapter.startCamera(this, this, preview_view.surfaceProvider)

override fun onDestroy() {
    super.onDestroy()
    cameraAdapter.shutdown()
}
Step 9 - Magic!
Keep in mind that this will of course only work on a physical device since emulators lack the required enchanted crystals. It's very technical.
If you click that sparkling green Run button again, you'll find that your phone is now imbued with supernatural powers! Point it at anything with text and be amazed at how those very same words appear in Logcat as if by magic.
Of course, it might have been a little more impressive if the text appeared on screen instead of in Logcat, but luckily you're a resourceful mage capable of improving on what you've seen here today.
Conclusion
That's it! If you followed every step of this ritual to perfection, one of two things will have happed. Either you will have been utterly amazed by the sorcery you have witnessed, or you would've wasted like 30 minutes of your life. Either way, you've earned your magic patch. Congratulations!
With your newfound powers you'll be the ire of the the townsfolk, but remember that great power brings great responsibility. Whether to use your magic for good or evil remains your prerogative. Glucode can accept no responsibility in this regard.
I hope that you've come to realize how easy it is to harness the power of machine learning to build some truly wondrous tools and that you will only be bound by the limits of your imagination.
Tell us about your project
We believe that something amazing can come from combining your vision with our expertise.